Designing chases
Controlling each channel individually is fun, but tedious. A particular setting of the lights can be stored as a preset, and presets can be sequenced to create a chase. Creating a chase like this is very flexible, but still very low level and a bit of work. A quicker way of creating simple chases is by using the design wizard of Glight. Let’s do this…
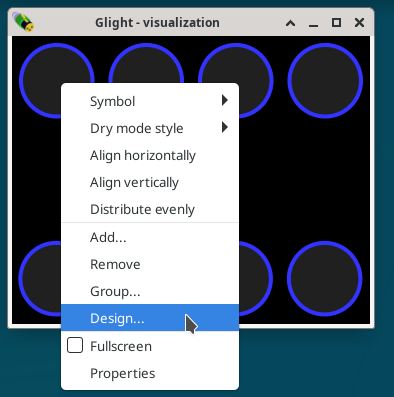
In the visualization window, select all the lights and right click on one of the lights. From the pop-up menu, select the Design… option.
The design window appears, showing all of the lights already selected. Since we want to create a chase involving all the lights, this is what we want. If we were creating a chase with only the 4 upper row lights, we could have selected those 4 in the visualization window, or we could change the selection at this point in the design window.
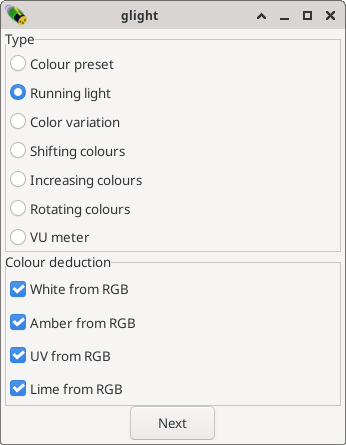
Press the next button to continue the design process. In this step, the selected fixtures can be reordered, if this would be necessary to create the particular desired chase. Because our fixtures are already ordered logically, we can skip this step and immediately press next. The next step is to select what type of chase (or effect) we want to create. Select Running light: this is a simple chase that switches one light on at a time and moves it from one to another light. Note also the options in the bottom half of the screen, which affect how amber, white or UV channels are going to be interpreted, if present.
Press next to go to the colour selection step. Here we can assign a colour to each light. Another choice to make is the kind of movement that should be made. Increasing order, decreasing order, back and forth and random will switch one light on at a time. With two rows of lights, that is not what we want.
Note
By default, every light is assigned to a step in the chase. The + and - buttons on the top of the window can be used to increase/decrease the number of steps. When there are fewer steps than lights, the sequency is copied untill all lights are involved. For example, by using only two steps, four lights will be on at the same time.
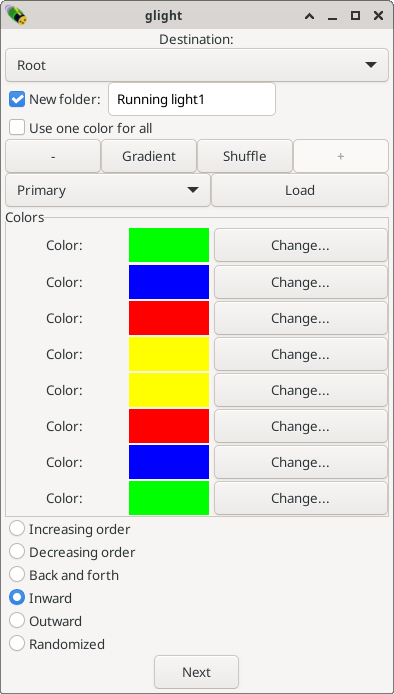
Select inward and some nice colours and press next to create the chase. The main window will now show a “Running light1” folder. Enter it by double clicking on it, and several Runchase objects appear:
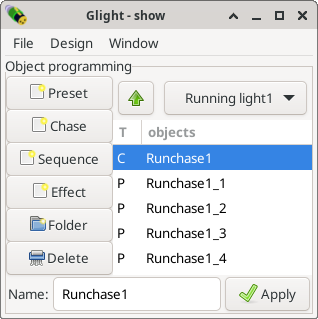
There should be one chase (‘C’) object and four presets (‘P’). Each preset is one of the steps of the chase. The chase and presets can be manipulated individually by double clicking on them.
Before doing so, it is useful to turn on the chase, as follows:
Open a new fader group frame, assign the first fader to Runchase1 that is inside the “Running light1” folder.
Optionally, rename the fader group to “Chases” and close the other fader frames.
Switch the Runchase1 fader on.
You should now see your lights animate!
Next chapter: Modifying a chase